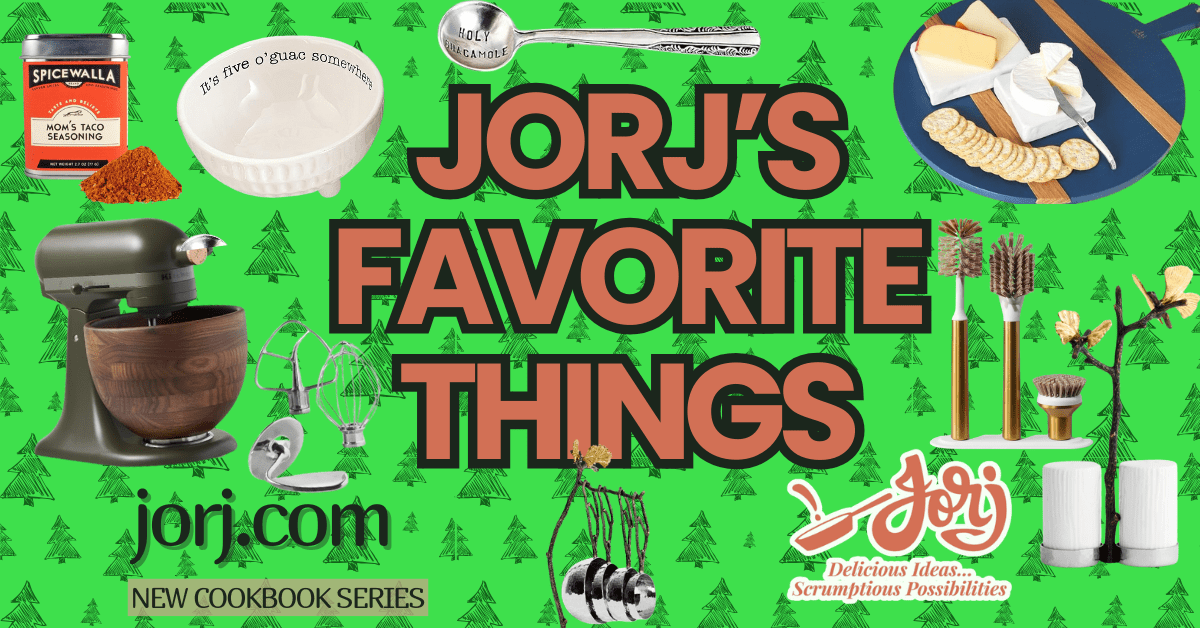
Holidays With Jorj and Sue! Festive Focaccia + Acrylic Art

Holidays With Jorj and Sue! Festive Focaccia + Acrylic Art

I am SO excited to share with you my easy holiday focaccia recipe!

This delicious side dish is the perfect way to get creative and crafty this holiday season.

Whether you are looking for a unique centerpiece or just some tasty treats to enjoy with family and friends, this easy recipe is sure to please.


Is It Easy To Make Bread Dough At Home? YES!

How To Embed Veggies In Foccaccia Bread

INGREDIENTS FOR GARDEN ART FOCACCIA BREAD

2 ¼ teaspoons active dry yeast

1 tablespoon granulated sugar

1 ¾ cups warm water

5 cups unbleached all-purpose

1 tablespoon kosher salt

1 cup olive oil, divided

2 tablespoons Parmesan cheese

2 teaspoons sea salt

1 teaspoon dried thyme 

1 teaspoon dried rosemary

Fun Veggies: Roasted red peppers, English peas, etc.

Tried it? Tag it!

I would love to see what you did with this recipe.  Share your creation by tagging #inthekitchenwithjorj and with Scrumptious Possibilities With Jorj, my free private home cooking group.

How to make holiday art focaccia bread

Place the yeast and sugar into a small bowl. Stir in the warm water. Place the bowl in a warm place until the yeast is bubbling and fragrant, about 15 minutes. I use the proof setting on my warming drawer for this.

Use an electric mixer fitted with a dough hook to combine the flour, salt, ½ cup of olive oil and the yeast to form a dough. Once the dough comes together, continue to knead the dough in the machine until smooth. Stop the machine and check the dough every couple of minutes. The dough should be smooth and elastic, hold its shape around the dough hook and spring back when you indent it with your finger. This takes anywhere from 5 to 8 minutes using the mixer. If you are kneading by hand, knead until you can’t knead anymore!

Transfer the dough to a lightly floured surface. Knead it by hand for an additional 30 seconds. If the dough is too sticky, you can sprinkle with additional flour. Form the dough into a ball and transfer to a bowl that has been lightly coated with olive oil. Cover and place in a warm place to rise until doubled in size, about 1 hour. I use my warming drawer for this step, too.

Pour the remaining cup of olive oil onto a 12 ½ x 17 ½ x 1-inch jelly roll pan. Transfer the dough to the pan, stretching it out to fill the pan. Turn and coat with oil on both sides. Use your finger to poke indentations into the dough. These will be the “nooks and crannies” to hold the seasoning in the next step. Place the dough in a warm place to rise again, for 1 hour. Yep, the warming drawer is still the best place!

Preheat the oven to 400°. Transfer the pan from its warm place. Sprinkle with Parmesan cheese, sea salt, thyme, and rosemary. Drizzle with a bit more olive oil. Bake until the top of the bread is golden brown, about 15 to 20 minutes. Cool the bread in the pan before cutting into squares.

The Art of The Fresh Market

Grab the book that contains my favorite travel adventures, with inspired original artwork by artist Susan Fazio.
New Year, Old Friends and the Birth of This Book

Join Jorj In The Kitchen!

Join Jorj for Meal Inspiration & Home Foodie Conversation!

Stop Holiday Food Waste With These Recipe Remixes

Stop Holiday Food Waste With These Recipe Remixes

Stop Food Waste Leftover Remix

Throw out your Thanksgiving leftovers? Think again! You may have a few dishes that you can breathe new life into before it’s time to toss. Take a look and see how you can reduce holiday food waste!

I try to reduce food waste with my lovingly prepared holiday meals where possible, and I’m sure you’ll agree that it feels good to create new dishes instead of throwing out leftovers!

Freezing leftover turkey and sides will extend the life of the leftovers and create new foundations for future dishes.

November 29th is observed as “Throw Out Your Leftovers Day” and I say repurpose what you can safely and deliciously!

As a reminder, always follow the latest USDA guidelines on safe leftover consumption and when in doubt, toss it out!

Turkey Ravioli With Homemade Ricotta

Making ravioli is easier than you think when you pick up wonton wrappers in advance of this recipe remix. This recipe works whether you have leftover chicken OR leftover turkey…It’s PERFECT!

And if you need a homemade ricotta recipe, I have that, too.

Yum! Monte Cristo Sandwiches after Thanksgiving!

Jorj’s Monte Cristo

The Monte Cristo sandwich is a sweet-meets-savory classic that’s so yummy, it’s been on Disneyland’s Blue Bayou and Tahitian Terrace menus since 1966!

My recipe calls for turkey and ham – or just one of the two – generous amounts of sweet cranberry sauce, and slices of Muenster cheese – made in a cast iron skillet.

Leftover Turkey Shepard’s Pie

Who says you can’t transform those last scraps of turkey into a HEAVENLY Shepard’s Pie? When you follow my instructions and pipe the sweet potato onto the top of the casserole dish in artful little dollops, compliments will follow! Substitute the lamb for your turkey and you’ll be set.

Leftover Potatoes, So Many Ways!

Don’t settle for potatoes one way when you can make potatoes into several delightful dishes, like leftover Mashed Potato Croquettes or a hearty Breakfast Skillet with Glazed Eggs!

It’s not hard to find an excuse to eat more pototoes…but if you need ideas to jazz up your leftover potatoes, you have come to the right place!

Shop Jorj's Cookbooks

7 Cookbooks and Counting!
Pick up a cookbook (or 3)

Turkey Day! It’s All in the Planning

Turkey Day! It’s All in the Planning

Thanksgiving is here AGAIN!

If you want to enjoy Thanksgiving as much as everyone you have invited to dinner, a little advance planning is the key.

Let’s take the stress out of the meal.

Here’s my sure fire guide to making sure that this year’s Thanksgiving is sooooo much FUN for everyone…especially you! Start early.

If you breakdown a complicated meal into smaller parts, you’ll finish your tasks ahead of time.

Two Weeks Ahead

Make your meal plan.

Make a list of the dishes you plan to cook, those you’re going to pick up, and those that others are bringing to the party.

Make a grocery list of the ingredients you need. Sort your list by departments: dairy, produce, pantry staples, meats, and poultry.

|This makes your trip to the grocery store a lot easier to maneuver.

 Take stock of your bar and include wine, mixers, and garnishes on your list.


After your grocery list is prepared, check your pantry to see which items you’ve already stocked and cross them off your list. (You’re already making progress!)


Now, place any orders you need to make. The turkey, of course (I like to order a fresh turkey), bakery goods and specialty items.

Hey! If you are thinking about some Brussels Sprouts in your turkey day meal plan… watch out for next week’s video!

One Week Ahead

Plan your tablescape.

Take stock of your china and flatware to make sure you have enough. Same goes for glassware and crystal. Don’t be afraid to mix and match china patterns. There’s creativity in designing a pretty table.


Look for festive placemats, table runner or tablecloth cloth. A simple throw blanket can double as a cloth on your table. Locate candlesticks and votive candles. Don’t be afraid to experiment with those cute twinkle lights wrapped around pillar candles for some real tablescape sparkle!


 Create place cards (a great craft to do with kiddos) assemble your centerpiece and collect décor for platters. Pretty twigs and stems and whole fruit are good for decorating. I love to include food as part of my tablescape centerpiece. I place artichokes alongside pears and limes for a green experience.


 Add a few branches, pinecones, and a gourd or two and you have an organic look that is perfect for the occasion.

Saturday Before Thanksgiving

Shopping Day!

If you are farmer’s market shopper, get up early and visit the market you love. Purchase all the fresh produce items that you need.

Stop and smell the coffee beans. Remember this is not a race. Take time to enjoy your stroll through the market. Smile at the people you pass and greet your favorite farmers.

This is the season to be thankful for the growers! Slow down long enough to enjoy a festive cup ‘o Joe while you double check your list.


Finish up at the grocers to purchase anything you were not able to find at the market.

Sunday Before Thanksgiving

Get Your Apron Out!

Make the dishes on your meal plan that are easily made in advance, like chutneys and relishes.

Really, you can make almost everything in advance, freeze and thaw!

Lay out serving dishes and utensils.

Tuesday Before Thanksgiving

It’s Prep Day! 

Chop and prep all the ingredients you will need. If you need onions for three dishes, chop a bunch. Same goes for apples for pie and potatoes for mashed potatoes. Here’s a trick. Submerge potatoes in cold water ian the pot you will use to cook them in and place them in your fridge. They will be fine until you’re ready to boil.

Set your table! Prepare your centerpiece. Get those place cards placed! If you are hosting a crowd, a buffet table is the way to go.


Set up your bar. Did you remember to make extra ice?

If you have a frozen turkey, let’s get it on its way to thawing.

Wednesday Before Thanksgiving

Prepare your desserts. Bake your pies.

Prepare your casseroles and sides. You can bake most of these todays and simply warm them up tomorrow.

Make your gravy. It will be even better if you chill it over night and then warm it up tomorrow.

Prepare dough for breads or rolls. Letting dough rise in the fridge overnight is a good thing.

Cover everything with plastic wrap and store in the fridge until tomorrow. You can place the baking dishes on top of each other to save space. Use a heavy piece of cardboard or a thin baking sheet to separate the dishes.

Thanksgiving Morning

It’s Show Time!

Get that bird ready to roast. Organize your oven racks and preheat so that you’re ready to bake and warm. 


Before Your Guests Arrive

Just a Few Last-Minute Details!


Prepare mashed potatoes. Save the potato water to help thicken your gravy. 


Set out appys. 


Get the ice in the bucket. 


Pour yourself a glass of wine…. you’re doing great!

The Big Ta Dah!

Pull the turkey from the oven and transfer to a cutting board. While he rests, encourage friends and family to help you get the casseroles and side dishes to the table.

Pour gravy into boats, carve the bird, say a prayer of thanks…. And enjoy your family and friends!


Here’s a recipe to help you jump start your turkey day prep!

Servings

A Crowd


Ready In:

30-minute prep cuisine with roasting, simmering

Good For:

Holiday Entertaining
Fall/Winter

Ingredients:

2 tablespoons olive oil
2 heads garlic, halved
2 medium onions peeled and cut into chunks
4 large carrots, trimmed and cut into chunks
6 celery stalks, cut into pieces
4 large turkey wings, about 3 pounds
2 (or more) tablespoons cornstarch
1 tablespoon kosher salt
2 teaspoons course black pepper
1 teaspoon ground sage

Tried it? Tag it!

I would love to see what you did with this recipe.  Share your creation by tagging #inthekitchenwithjorj and with Scrumptious Possibilities With Jorj, my free private home cooking group.

Preheat the oven to 450°. Drizzle the olive oil onto a baking sheet with lip. Place the vegetables and turkey wings into the baking sheet. Roast in the oven for 15 to 20 minutes, then reduce the heat to 350° and roast until the turkey wings are golden brown, about another hour. During that time, check to make sure that the veggies are not sticking to the baking sheet. Use a spatula to scrape the bottom and add a little water to loosen everything. Remove the pan from the oven and let cool slightly. Pour everything into a large pot or Dutch oven. Place the pot on the stove. Add 1 cup dry white wine and simmer over medium heat until most of the liquid disappears, about 5 minutes. Cover the vegetables and turkey wings with water, about 1 quart. Bring the liquid to a boil over medium high heat and then reduce the heat to medium-low. Simmer the stock until it is reduced by half, about 1 hour. 

Pour the stock through a wire mesh colander and into a medium size bowl. Use the back of a spoon to push the veggie and turkey pieces into the bottom of the colander to push through all the juices. Place the bowl with the stock into the fridge to chill for up to one hour or for several days. (You can sift through the colander and gather enough turkey meat for a couple of yummy hot turkey sandwiches!)

To make gravy from stock, remove the bowl from the fridge. Use a large spoon to skim off and discard the thin layer of fat from the top. Transfer the stock into a saucepan and slowly bring to a boil over medium heat. Whisk together 2 tablespoons cornstarch with 1 tablespoon water. As the stock slowly boils, stir in the cornstarch slurry. The gravy will begin to thicken. You can add as much thickener as you like to get your desired gravy consistency.

Reduce the heat to low and let the gravy simmer slowly. Season the gravy with sage, salt, and pepper, stirring in just a bit at a time and tasting while you stir.

Holiday Gift Idea!

Need a little holiday gift to bring the grandkids, or a thoughtful way to entertain your guests’ children at your upcoming feast?

Purchase “Embarassing George” by Kimber Fox Morgan with cute illustration artwork by Jessica Kwan, available direct from the author herself or through my Amazon link!

As an Amazon Associate I earn from qualifying purchases.

Grillin’ and Chillin’ This Memorial Day Weekend

Grillin’ and Chillin’ This Memorial Day Weekend

Strawberry Recipes for Desserts

Make and take this effortless side, or get it going while your main course is on the grill or stovetop! It’s all about grilling and chilling this Memorial Day Weekend.

Whether it’s burgers, brats, ribs, or steaks, the sides are just as important as the main course when you’re planning your Memorial Day bash.

There’s lots of planning and lots of dishes to prepare. Here’s a way for you to make things just a little bit easier on yourself this year. 

Start with grilled veggies!

Any veggie will work here. My favorites are thick asparagus spears, bell peppers, red onions, zucchini and yellow squash, eggplant and portobello mushrooms. 

For the asparagus, break off the tough ends and trim. For the mushrooms remove the cap and inner gills. Slice the eggplant and red onion into ½-inch circles. Cut the squash diagonally into ½-inch ovals.

As you slice your veggies lay them onto a baking sheet. You can use parchment paper to layer everything on top of each other. Brush both sides with vegetable oil and sprinkle with salt and pepper. Now you are ready to grill.

Use an open flame or your trusty grill pan to cook each slice turning once so that you have grill marks on both sides.

Make sure you do not over-cook. You want firm veggies, not mushy ones. Remember things keep on cooking after you remove them from the heat.

Transfer the veggies from the grill to the baking sheet. You can cook these the day before your barbecue. Cool to room temperature and cover with plastic wrap. Chill ‘til you are ready to serve. 


how to make easy grilled veggies for memorial day

Now, here is where we get creative!

1: Layer the veggies onto a platter. Drizzle with olive oil and red wine vinegar. Shave thin slices of Parmesan cheese over top and sprinkle with toasted pine nuts.

2: Stack the veggies, beginning with eggplant and layering from largest slices to smallest. Layer in a slice or two of mozzarella cheese and add a few leaves of fresh basil on the top. Drizzle with olive oil.

3: Layer the veggies onto a platter and add slices of tomato and watermelon. Use a round cookie cutter to cut out circles of the watermelon that are about the same size as the tomato slices. Add a sprinkling of blue cheese and drizzle with balsamic reduction.  

4: Chop the veggies into similar size pieces and stir into rice for grilled veggie pilaf.

5:  Slice the veggies into thin strips and pair them with your grilled beef or chicken for fajitas, enchiladas, or quesadillas.

The secret here is that you can grill the veggies in advance and with little effort assemble the dish while the main course is sitting on the grill. What a great plan!

Mardis Gras King Cake Donuts for Fat Tuesday

Mardis Gras King Cake Donuts for Fat Tuesday

mardi gras king cake donuts

Need a Mardi Gras party food idea? Make Fat Tuesday delicious with this twist on traditional King Cake, from Jorj’s kitchen to yours!

Skip to Recipe

Twelve short days after Christmas is Three Kings Day (also known as the Epiphany).

This date marks the official beginning of Mardi Gras which last until the first day of Lent. Most of us don’t celebrate the entire season, after all, there are other holidays in-between!

So many Mardi Gras celebrations are left for the two weeks before Ash Wednesday.

My Mardi Gras memories settle themselves in my Grammy’s kitchen on the Tuesday before Ash Wednesday, known as Fat Tuesday.

My sweet, itty bitty Polish grandmother would create the most delicious pillowy donuts that day. Hot from the frying oil they were doused in powdered sugar and lasted just moments before we popped them into our mouth.

Traditional Polish donuts known as packzki are rich and filled with cream or fruit. My Gram filled hers with grape jelly. But she saved the unfilled donuts for us to gobble up. 😋 

I’ve made jelly-filled donuts before.

I’ve even made pumpkin spice donuts with maple glaze.

This year, I’ve decided to make King Cake donuts to celebrate the season.

These are big, fluffy, light-as-air donuts doused in a sugar glaze and sprinkled with traditional colors of the season, purple, yellow, green, and gold sprinkles.

Want some?

Tried it? Tag it!

I would love to see what you did with this recipe.  Share your creation by tagging #inthekitchenwithjorj and with Scrumptious Possibilities With Jorj, my free private home cooking group.

Jorj’s Mardis Gras King Cake Donuts

Servings

Makes about 9 large donuts plus holes

Ready In:

15 minutes for dough
15 minutes to cut out
2 hours to rise

Good For:

Dessert
Parties
Breakfast

Ingredients

For Donuts

  • 3 cups all-purpose flour
  • ¼ cup granulated sugar
  • 2 teaspoons active dry yeast (you can substitute with instant)
  • ½ teaspoon kosher salt
  • ¼ teaspoon nutmeg
  • 1 cup milk, room temperature
  • 2 tablespoons butter, melted
  • 1 large egg
  • 1 teaspoon vanilla extract
  • Vegetable oil for frying

For Glaze:
1 ½ cups confectioners’ sugar, sifted
6 tablespoons half and half or cream
1 teaspoon vanilla extract
Sprinkles (green, yellow purple and gold!)

Jorj’s Mardi Gras King Cake Donuts

Place the flour, granulated sugar, yeast, salt, and nutmeg into the bowl of an electric mixer fitted with a paddle attachment. Whisk the milk, butter, egg, and vanilla together in a bowl. Pour the wet ingredients into the dry ingredients and mix until the dough just comes together. Stop the mixer, cover the bowl with a clean towel, and rest for 5 minutes. Change the paddle attachment to a dough hook and beat until the dough begins to pull away from the bowl, about 6 to 8 minutes.

Dump the dough into a bowl sprayed with vegetable oil spray. Turn the dough to coat on all sides. Cover the bowl with a clean towel and let rise in a warm place until doubled in size, about 1 to 1 ½ hours. The dough is doubled in size when you stick your finger into the dough and the indentation stays.

Roll out the dough and use a donut cutter (or round biscuit cutters) to cut out the doughnuts and holes. Place these onto baking sheets lined with parchment paper. Place into the warm place and let rise until doubled in size again, about another 30 minutes.
Heat oil to 350° in a deep pot or Dutch oven. Only let the oil fill the pot one third up the sides so that when it bubbles up it won’t overflow.

Fry the donuts in batches. Don’t overcrowd the oil. We want them to swim in the oil… not drown! Fry until they are golden on one side and then carefully flip so that they are golden on both sides, about 2 to 3 minutes. Transfer the donuts to a rack set over paper toweling to drain.

Whisk together the sifted confectioner’s sugar, vanilla and cream. Dip one side of the donuts into the glaze. Return to the rack and douse with sprinkles.

Valentine’s Day Dinner Ideas: Beloved Travel Recipes

Valentine’s Day Dinner Ideas: Beloved Travel Recipes

World Travel Foodie Adventures!

Celebrate your sweetie, family, and loved ones with memorable meals from around the globe. My gift to you this Valentine’s are my very best globally-inspired meals, designed to make memories any moment that calls for celebration.

#wanderlove

This Valentine’s Day, let’s take a trip around the world without leaving your own cozy kitchen. Let’s create a menu inspired by far-away places. Let’s create a dish or two to share with those you may not have seen in a while. And while we’re doing all of this, let’s share some LOVE…’cause all you need is….

FOOD!

Food that you can share with your loves. Canvas and Cuisine, the book I wrote with Susan Fazio is filled with foods that are inspired by our travels. But, more than this, the book is about love… love of family, love of neighbors, and love of friendships.

My gift to you this Valentines’ Day is all about LOVE. It’s about creating dishes that inspire you. Food that takes you just a bit your of your comfort zone. And dishes, that beg for your inventiveness.

Chinese Hot Pots: A Must-Eat for Travel Channel Foodies!

Grab Jorj’s Travel Foodie Guide

Join Jorj for Meal Inspiration & Home Foodie Conversation!

The Art of The Fresh Market

Grab the book that contains my favorite travel adventures, with inspired original artwork by artist Susan Fazio.
New Year, Old Friends and the Birth of This Book