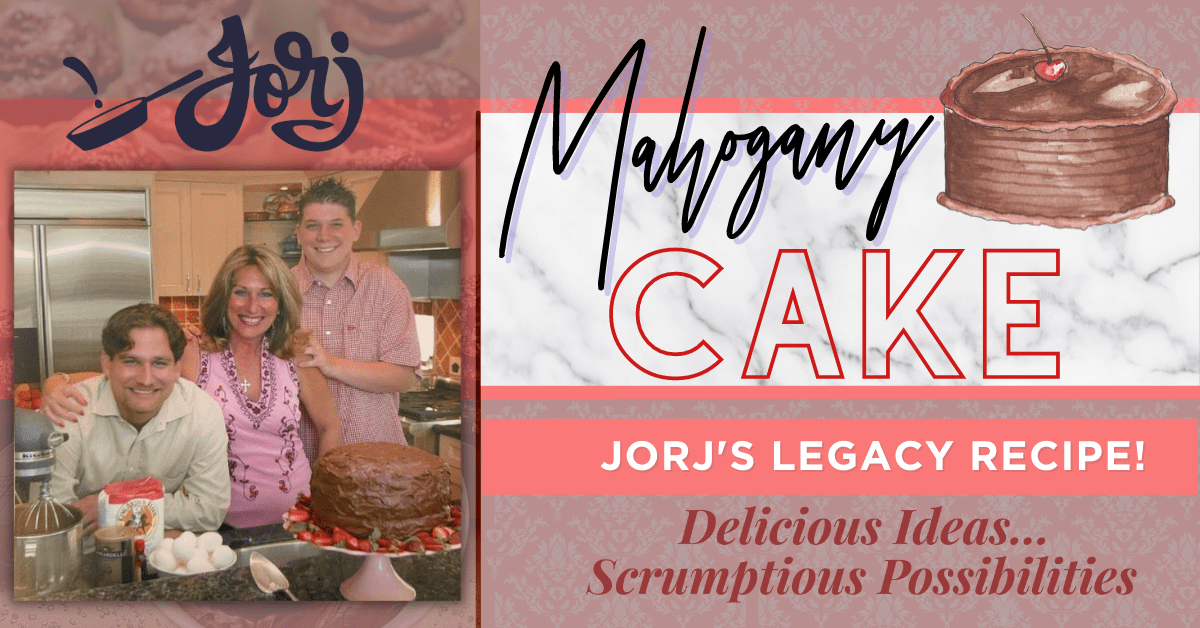
I’ve baked this chocolate cake for every birthday for every child and friend for years and years. It’s dark, rich, and has a flavor all its own. Try this featured Women’s Day Magazine recipe that everyone will ask you for!
In honor of National Chocolate Cake Day, I give a nod to my late mother-in-law, Mary Jane Morgan, and the legacy chocolate cake she passed down to me from her mother, Irene Seeley. I remember traveling with my firstborn, Trey, to visit George’s parents in September 1979. Trey turned two that visit, and Mary Jane made chocolate cupcakes turned into clowns using ice cream cones as hats and candies for their faces. Trey was delighted and I noticed something funny. Hubby, George, would sneak into the fridge and scoop from a bowl spoonful of left-over frosting again and again and again.
Mary Jane shared the cake recipe and I’ve baked it for every birthday for every child and friend for years and years. I’ve made it as a sheet cake, a two-layer round cake, and a four-layer square cake. The frosting is so gooey that the more layers you try the more the cake slides to one side or another leaving it a tiered cake or as my sons refer to it the AVALANCHE cake!
No matter how it looks, the cake is incredible. It’s dark, rich, and has a flavor all its own. The secret ingredient is black walnut flavoring. McCormick produced this essence until ten or so years ago when it was dropped. Lovers of the cake would ransack their grandmother’s pantry for stored bottles of the stuff. We found quite a few that way! Today, Amazon will give you a good selection of choices when you search, and I’ve tried them all. It works!
This is truly our family’s legacy cake. It was featured in Women’s Day magazine when my first book was published in 2000. In honor of National Chocolate Cake Day, I will share with you the short-cut secret to making this cake for your family.
Yes, it is a departure from the original, but I’m sure both Mary Jane and Irene will approve of this modernization.
Jorj’s Mahogany Cake (The Lava Legacy)
Servings
6-8
Ready In:
30-35 Minutes Until You’re Ready
Good For:
Everything!
Ingredients
Devil’s Food Cake recipe or boxed mix
¾ cup Sprite
¾ cups brewed coffee
4 tablespoons of black walnut flavoring
6 cups of confectioners’ sugar
¾ cup cocoa powder
¼ teaspoon salt
4 tablespoons melted butter
⅓ cup milk or cream
Jorj’s Mahogany Cake (The Lava Legacy)
Start with a Devil’s food cake recipe.
In place of water, use ¾ cup Sprite and ¼ cup brewed coffee.
Add 2 tablespoons of black walnut flavoring.
Continue as directed on the box and bake as either cupcakes or any version of your favorite layer cake. Cool the cakes.
For the frosting:
Add 6 cups of confectioners’ sugar into the bowl of your electric mixer
Add ¾ cup cocoa powder and ¼ teaspoon salt
Mix in 4 tablespoons melted butter, ½ cup brewed coffee, 2 tablespoons black walnut flavoring, and ⅓ cup milk or cream
Mix this all together, scraping down the sides
Home Chef Tip!
If the frosting is too loose, add more sugar. If it’s too tight, add more milk. Keep a can of prepared chocolate frosting on hand just to be safe
Tried it? Tag it!
I would love to see what you did with this recipe. Share your creation by tagging #inthekitchenwithjorj and with Scrumptious Possibilities With Jorj, my free private home cooking group.
Spring means berries and cherries and all the delicious baking that goes with it! Even if you can’t go to the farm, let the farm come to you by way of your local grocer and get ready to cherry and berry. Click to skip to the recipe
When I think of Spring, I think about berry pickin’. When I was little, my grandparents had a huge garden. (They also raised pigs and chickens… but that’s another story.) In the garden we picked ripe strawberries from vines for Gram when asked.
We usually ate more than we turned over for Gram’s famous berry pies as was evidenced by our stained (and somewhat guilty) smiles.
At the end of Gram and Gramp’s long, dirt drive was a hedge of berry bushes. I think they were huckleberries, but they could have been blackberries. I remember my brother and sister and I would pick the berries and thread them onto long straws and then eat them like an ear of corn. Yumm! Many of these didn’t make it to the pies, either.
Luckily, Gram had nine grandchildren, and even given our full bellies, pies were baked!
Today, I love to take my grandkids to a strawberry patch at this time of year, but, in this climate of social distancing, the patches are devoid of pickers, yet abundant in berries. I recently bought a box of over-sized deeply red, ripe, strawberries from my grocery store. The handwritten sign told me that they came from a local farm, not but five miles away.
Which leads me to my berry recipes! The first is not a recipe. It’s a “just a little extra’ to your everyday standard.
I’m talking about blueberry pancakes with blueberry syrup.
Blueberry Pancakes with Berry Sauce
I add a dash of vanilla and a sprinkle of cinnamon to my standard boxed pancake batter. Then I substitute melted butter for vegetable oil. This creates rich batter for your cakes.
I reserve about twenty blueberries from a pint. The rest I place into a deep saucepan. Pour maple syrup over the berries and simmer on low until the berries break down. Be careful, the berry syrup can bubble up if you’re not watching. Turn off the heat so that the syrup cools down a bit.
Make the pancakes as you normally would, but place a few of the reserved berries onto each one before you flip it over. Stack the blueberry pancakes on a plate. Top with a dollop of butter and ladle warm berry syrup over the top. The cakes absorb the berrieness from inside and out! It’s a treat.
As you might imagine, I can find myself with a bunch of leftover berries. These, I freeze and use to make smoothies and sauces. My lemon cake is the perfect foil for an easy berry sauce.
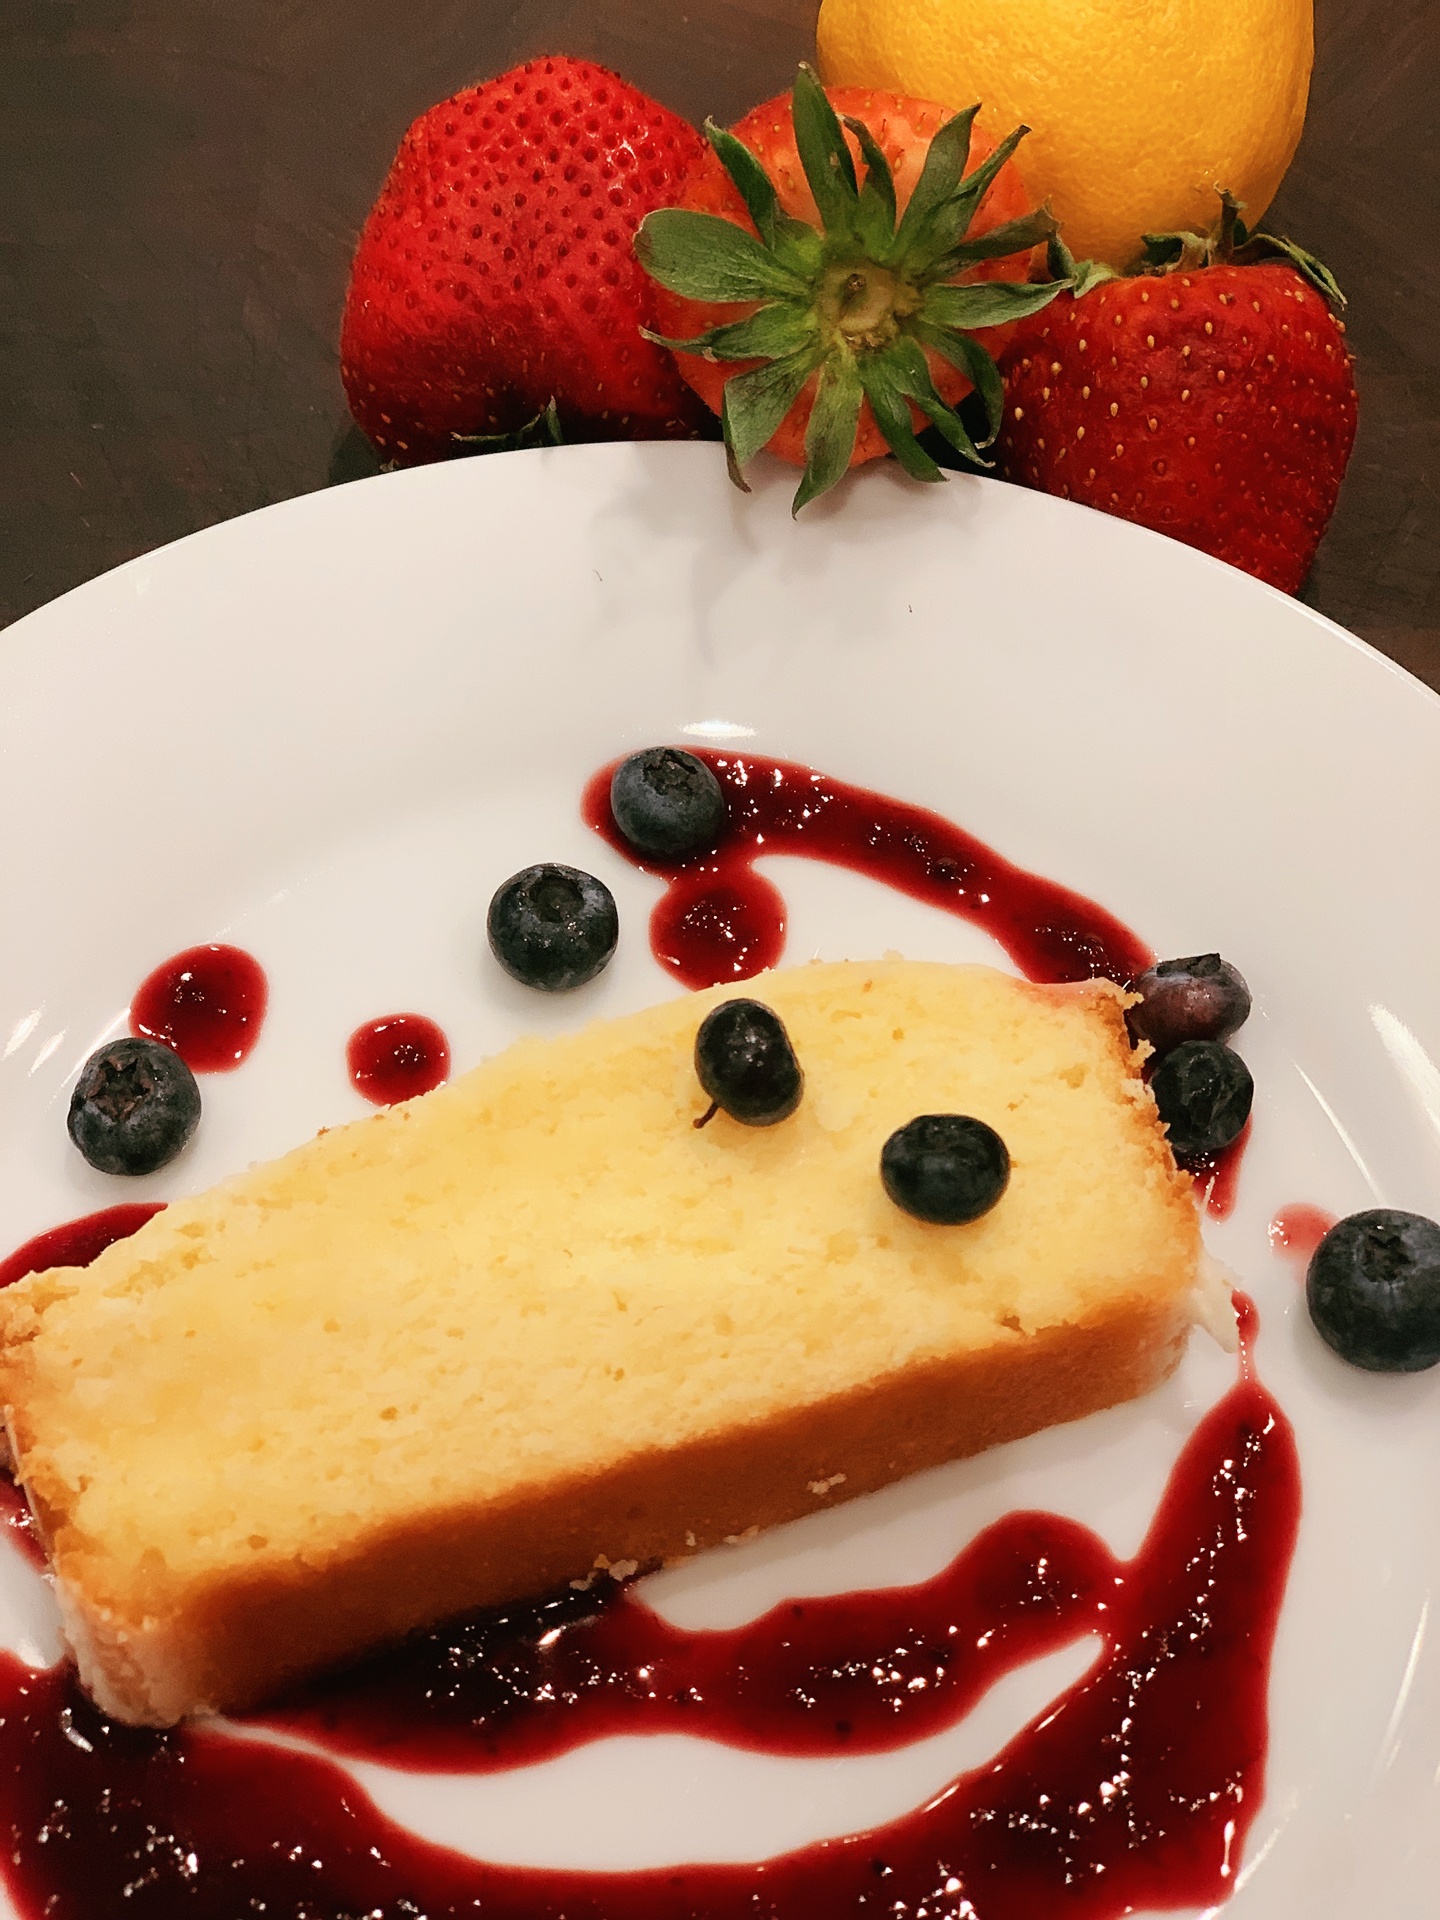
Glazed Lemon Cake With Very Berry Sauce
Serves:
Time:
A crowd
30-Minute Cuisine, Plus 1 Hour Baking
Ingredients
This lemony cake with berry sauce is just puckerable enough to make it into the lip smackin’ category.
For cake:
1 ½ cup unbleached all-purpose flour
½ teaspoon baking powder
½ teaspoon kosher salt
¾ cup butter, 1 ½ sticks, room temperature
1 cup granulated sugar
3 large eggs
¼ cup sour cream
Zest from 2 lemons, about 2 tablespoons
Juice from 2 lemons, about ¼ cup
1 teaspoon vanilla extract
For glaze:
1 cup confectioners’ sugar
Juice from 1 lemon, about 2 tablespoons
1 tablespoon cream
½ teaspoon vanilla extract
For berries:
4 cups assorted berries (I used frozen left-over berries)
½ cup granulated sugar
Preheat the oven to 350°. Lightly coat a 9” x 5” loaf pan with vegetable oil spray. Fit a piece of parchment paper into the pan with some of the sheets overlapping so that you can use the paper to remove the cake after baking. Then spray the paper.
Whisk together the flour, baking powder and salt.
Use an electric mixer to combine the butter and 1 cup sugar until creamy and smooth. Stir in the eggs, one at a time. Stir in the lemon zest and juice from 2 lemons, sour cream, and vanilla. Add the flour about ½ cup at a time, until the batter is just mixed together. Pour the batter into the loaf pan. Bake until a tester inserted into the center of the cake comes out clean, about 45 to 60 minutes. Cool the pan on the rack for 30 minutes, then transfer the cake from the pan to the rack to cool completely.
While the cake cools, stir together the confectioners’ sugar, juice from 1 lemon, cream, and vanilla. The glaze will be thick, but pourable. Place the cake onto your serving platter. Pour the glaze over top.
Place the berries and ½ cup sugar into a deep saucepan and simmer over medium-low heat. Cook the berries until they break down and are soft and mushy. Cool to room temperature. Place a colander into a larger bowl. Push the berries through the colander, using the potato masher. You want most of the pulp and seeds to stay in the colander. Transfer what’s left in the bowl to a small pitcher.
Drizzle the sauce onto a plate. Top with a slice of cake and a few extra berries for garnish.
Best Cherry Tart Recipe
I have a thing with cherries. I love cherry pie, cherry jam, cherry chutney. Just eating freshly pitted cherries with grandson, Ben, is a blast. He loves the pitting!
On the flip side, I deeply dislike canned cherry pie filling; Don’t get me started!
So, I came up with a way to satisfy my cherry pie craving, using fresh cherries and time-saving refrigerated puff pastry dough. It’s easy and delish!
Serves:
Time:
Makes about 20 palm-sized tarts
30-Minute Cuisine
Ingredients
These little tarts are best warm from the oven. You can make them and freeze them and bake them off when you’re ready for a treat!
1 tablespoon coarse sugar (I used raspberry flavored coarse sugar)
Place the cherries into a deep saucepan. Add the sugar and splash in about 2 tablespoons of water. Heat the cherries over medium heat until they begin to breakdown and the sugar dissolves, about 5 to 8 minutes.
Stir together the cornstarch, lemon zest and juice until smooth and pour into the pot. Continue simmering until the cherries begin to bubble up the sides of the pan. Use a potato masher to mush together the cherries in the syrupy sauce. Continue simmering until the mixture resembles fruit jam. Remove the pot from the heat and cool to room temperature.
Place the dough onto your floured board or work surface. Roll out the dough to a rectangle about 15” x 18” and about 1/8-inch thickness. Cut the dough into four equal strips, horizontally and 5 equal pieces, vertically. You will end up with about 20 squares.
Preheat the oven to 425°. Place a colander into a larger bowl. Pour the cherries through the colander, using the potato masher to squeeze out as much of the juice as possible. Place a tablespoon of cherry filling on each square of dough. Fold the dough over and seal with the tines of a fork. I folded mine into triangles, but rectangles or squares are fine too! Place each tart onto a baking sheet lined with parchment paper. Brush each tart with the egg wash and sprinkle with coarse sugar. Bake until the tarts are puffed and golden, about 15 to 18 minutes.
I just returned from a whirlwind trip to Italy. We visited Sorento and the Amalfi coast and then motored our way north to the region of Tuscany. Most of us on the trip took in the sights and attractions, but I focused on the food and wine.
We interspersed multi-course meals in Michelin star restaurants with neighborhood trattoria’s (many of which offered menus featuring pages of pizza and pasta choices). I came away with three favorite dishes.
At the Don Alfonso 1890 Ristorante in Sorrento you can choose from several pre-set menus, starting with three courses and adding up to an astounding seven! My favorite course was dessert, a large platter filled with bite size pastries from truffles to cookies to nut-coated cake sticks, all set atop a smoke filled background. It was something! I’m posting a video to my social media on this one!
Just a quick nine minute helicopter ride from Sorrento you are transported to cliff side gardens and vast views of the Amalfi coast in the quaint city of Ravello. The Belmond restaurant in the Hotel Caruso sits at the top of the village and offers an outstanding dining experience. The menu features fresh Mediterranean cuisine, starring seafood from the coastal waters.
My favorite dish was an elegantly presented tuna tartar infused with fresh peaches. It was almost too gorgeous to eat, but I took one for our team and devoured every bite.
My final meal was a delicious lunch at Osteria di Passigno in Tuscany. The restaurant sits next to an ancient abbey house where a few monks still reside. The fields are filled with grape vines. A few varieties of wine are grown here, but the pride and joy is the Chianti Classico, a designation of wine that is solely made in this area.
After a quick tour of the winery and gardens, we were treated to a multi course meal that started with an extra virgin olive oil tasting and finished with pear-filled puff pastry drizzled with locally grown honey.
My favorite dish was a brothy fish stew accented with shaved vegetables that rose like stalagmites from the center of the dish.
I arrived home after a lengthy day (I mean 24 hours) of traveling. After a day of emptying suitcases, petting the parent-deprived dog and checking in with pals, I found myself in the kitchen. Inspired as I was, my first dish was neither pasta nor pizza. Instead, it was the delicious Mediterranean inspired fish dishes that won me over.
It took only a quick trip to the market to come up with the ingredients for one of my favorite dishes from SUNDAY BEST DISHES, Puttanesca Poached Cod. I share it with you, not only because it is a simple, yummy dish, but also, because it might inspire you to make Italy a destination in your travel plans.
Puttanesca Poached Cod
MAKES 4 SERVINGS
2 tablespoons olive oil
1 (7-ounce) tin flat fillets of anchovies packed in oil
1 (14-ounce) can marinated artichoke hearts, about 8 to 10 medium size, sliced
1/3 cup Kalamata olives, pitted and chopped
6 large garlic cloves, peeled and sliced, about 2 tablespoons
2 tablespoons capers, drained
1 cup red wine
1 (28-ounce) can diced tomatoes
1 (28-ounce) can crushed tomatoes
4 (4 to 6-ounce) fillets of cod
1 teaspoon kosher salt
½ teaspoon coarse black pepper
Lemon wedges
Place the olive oil and anchovies (with oil) in a skillet over low heat. Cook until the anchovies begin to melt. Increase the heat to medium high. Add the artichoke hearts, olives, garlic and capers. Cook for 3 to 5 minutes. Pour in the wine. Cook until most of the liquid disappears, about 3 to 5 minutes. Add the tomatoes. Reduce the heat to medium low and simmer until the sauce reduces by half, about 10 to 15 minutes. Place the cod into the sauce. Cover the skillet with a lid. Cook until the cod just begins to flake, about 5 minutes depending on the thickness of the fillets.
Season the top of the fillets with salt and pepper, and a sprinkle of lemon juice. Serve the cod surrounded by the sauce and lemon wedges.
That’s my grandson. livin’ it up in his Happy Place!
One of my grandson’s favorite things to do with his Papa is to visit the doughnut factory! This, if you haven’t guessed yet, is Krispy Crème. There’s something about watching the dough fry in the hot oil, and then travel through that sugar shower that no six-year-old can possibly resist!
With the addition of my new fryer, I’m experimenting with all sorts of fried delicacies. I’ve come to grips with the fact that I can’t match Papa’s doughnut factory experience, but I’ve come up with my own… guaranteed to catch the delight of my grandson and my adult pals as well.
Welcome to my Churro Shop. With just a bit of effort, you can set up your churro shop at home too! Give it a try!!
Churros with Cinnamon Sugar & Chocolate Dipping Sauce
Serves a crowd
30 Minute Cuisine
You cannot eat your way through Spain without finding your way into a Churro shop. Kinda like Krispy Crème, these doughnut-like wedges are served warm, right out of the fryer. They differ in that they are doused in cinnamon sugar, and served with a pot of warm chocolate for dipping. It’s pretty darn delicious.
For Churros:
3 tablespoons unsalted butter
2 tablespoons granulated sugar
1 teaspoon vanilla extract
½ teaspoon Kosher salt
2 cups unbleached all-purpose flour
2 large eggs, beaten
Vegetable oil for frying
For coating:
½ cup granulated sugar
2 teaspoons ground cinnamon
For Chocolate Sauce:
½ cup heavy cream
12-ounces semi-sweet chocolate chips
Heat 2 cups water, butter, sugar, vanilla, and salt in a deep saucepot over medium-high heat until the butter is melted about 3 to 4 minutes. Remove the pot from the heat and add the flour. Use a wooden spoon to mix the flour into the wet ingredients until it forms a dough ball. You want everything mixed together well. Let the dough cool to room temperature, about 5 to 10 minutes. Use an electric mixer to combine the dough with the eggs.
Transfer the dough (in batches) to a pastry bag fitted with a large star tip. Pipe the dough onto parchment-lined baking sheets. Chill until you are ready to fry.
Mix together ½ cup granulated sugar with ground cinnamon in a bowl. Transfer this mixture to a sugar shaker if you own one.
Heat heavy cream with chocolate chips in a bowl in the microwave, cooking 1 minute at a time. Stir in between cooking, until all the chocolate is melted.
Heat the oil in a fryer or deep pot to 375°. Remember to make sure that the oil only comes ⅓ up the side of the pot. The oil will bubble up when you add the churros. Cut the piped dough into 4 to 6-inch long pieces. (Basically, churros can be as long as you like, if they fit into your fryer). Place the dough lengths into the hot oil. Use a slotted spoon to gently move the churros in the oil. Cook until just golden brown. Transfer the churros to a paper towel-lined baking sheet. Generously sprinkle the hot churros with cinnamon sugar. Serve with hot chocolate for dipping.
I’m a few weeks early for a Fall vibe, but I’m ready for autumn already 🙂
You’re craving a cookie. You run to the panty, mix up a batter, add in all the chocolate pieces and nuts you can find. Next, you scoop them onto a baking sheet and voila… you have a cookie!
Hold your horses! What if you bake the cookie two times? Whaaat!? But why? I’ll tell you why. These cookies get a crispy outer crust (with a chewy center!), and hold up to a swim in a deep, dark cup o’Joe! I’m talking about biscotti.
Italian biscotti is a twice baked crisp biscuit, designed to be served for dunking – in coffee or your favorite dessert wine. When I’ve got a friends coming over, I love to “roll out the welcome”, as you can see in the photos below – check out the ingredients going into this light and fun dessert. It’s a little different than your traditional Italian recipe.
Traditional biscotti is flavored with anise seeds and hazelnuts. You can make your biscotti even more exotic by dipping the ends into melted chocolate. Here’s one of my favorite recipes from my book Fresh Traditions: Classic Dishes for a Contemporary Lifestyle. I broke it down into numbered steps this time.
Macadamia and Chocolate Chip Biscotti
Use this recipe as a guide to create your own favorite biscotti. Substitute your favor nut, white or milk chocolate – or eliminate both and add a tablespoon of your favorite liquor, or a touch of almond extract. It’s all good!
2 cups all-purpose flour
1 ½ teaspoon baking powder
¼ teaspoon salt
¾ cup granulated sugar
½ cup butter, room temperature (1 stick)
2 large eggs
1 tablespoon vanilla
1 cup macadamia nuts, coarsely chopped
1 cup semi sweet chocolate chips
Preheat the oven to 350 degrees
Whisk together the flour, baking powder and salt
Use an electric mixer to combine the sugar and butter until smooth and fluffy.
Stir in the eggs, one at a time.
Stir in the vanilla.
Stir in the flour mixture.
Stir in the macadamia nuts and chocolate chips.
Divide the dough in half. Wrap each half in plastic wrap and freeze for 20 minutes.
Remove the dough from the freezer. Use your hands to form each piece into a log, about 12 inches long and 3 inches wide. Place both logs on a Silpat (or parchment) lined baking sheet. Bake until golden brown, about 20 minutes. Remove from the oven.
Reduce the oven temperature to 300. Cool the logs for 15 minutes. Use a serrated knife to cut each log into diagonal ½-inch slices. Lay the slices onto the baking sheet. Bake until the biscotti is golden and dry to the touch, about 30 more minutes.
Yield: 3 dozen
Preparation Time: 20 minutes, plus refrigerating the dough and 1 hour total baking time