Easy Garden Art Focaccia Bread Recipe – Farmer’s Market Edition!
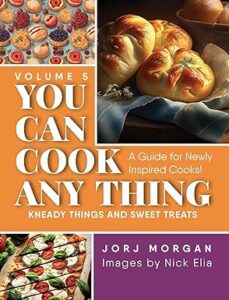
This garden bread art recipe was inspired by traditional Azerbaijani outdoor cooking and my love for all things fresh from the Farmer’s Market! Join me as I revisit my focaccia bread that first appeared in “Canvas and Cuisine: The Art of the Fresh Market”
Sometimes inspiration just hits! For me it started with the Azerbaijan cooking vlogs that constantly show up in my Facebook feed.
I used to look forward to seeing friends and kids of friends and grandkids of friends.
Now, I peer into the screen waiting to see my adorable Azerbaijan friends as they emerge through the green door of their tiny house to forage through the woods, harvesting as they go.
The only sounds you hear are the rustling of leaves and chirping birds. He throws down a metal pan, slices some logs and before you know it there is a working oven in the middle of a field or by the side of a stream or at the top of a ridge!
She uses a clever wooden board to chop everything from onions to a whole leg of lamb. He makes tea out of the flowers he picks as he passes the field.
I’m inspired by everything that they cook – always outdoors and always on an open fire. But what gets me the most is how she (Lord, I wish I knew her name) bakes bread at almost every meal using nothing but her hands and a covered skillet.
It’s amazing!
And even more, it makes me crave fresh baked bread almost daily.
Let’s face it…I have every modern tool known to man starting with electricity and ending with a machine fitted with a dough hook and still, I find bread making to be daunting.
I’m over it! If my Azerbaijan friend can bake gloriously delicious-looking bread over an open fire, then I can certainly take my bread baking to a new level using my state of the art kitchen. Right?
I have a really good recipe for focaccia bread in my book “Canvas and Cuisine: Art of the Fresh Market”.
The dough comes together quickly and rises when requested. It bakes in about 15 minutes and has just enough crumb to distinguish itself from flatbread. It’s my go-to bread recipe, so I decided that my focaccia dough would be my canvas.
My morning trip to the Farmer’s market yielded all sorts of treasurers. I purchased peppers and multi-colored carrots. I gathered my favorite purple-green tomatoes and all sorts of herbs. When I laid out all of these, I saw my plan come together. I would create a flower garden using veggies and herbs to decorate my bread. I would make my Azerbaijan friend proud!
It’s all in the planning, so I laid out my design on parchment paper while the bread was rising. This was the smartest thing that I did, because I could change things around on paper that I would have been stuck with when placed on the bread dough.
I used red onions for flower petals and chives for stems. I sliced the carrots using my mandoline and cut olives, red cherry bomb peppers and grape tomatoes into thin slices. Sage and parsley leaves pulled everything together and my flower garden was born.
In the end, it worked like a charm and my pals oohed and awed at the results. I must admit I was pretty impressed with myself!
My Azerbaijan friend started me on this journey. (I feel I have more to come!!) The Farmer’s market furthered my vision.
And here’s my take from this experience. Inspiration can be found anywhere; you just have to open your eyes.
What’s going to inspire you this week??
Garden Art Focaccia Bread Recipe
Servings
6 – 8
Ready In:
20 Minutes plus a few hours for bread to rise
Good For:
Appetizer, Brunch
INGREDIENTS FOR GARDEN ART FOCACCIA BREAD
2 ¼ teaspoons active dry yeast
1 tablespoon granulated sugar
1 ¾ cups warm water
5 cups unbleached all-purpose
1 tablespoon kosher salt
1 cup olive oil, divided
2 tablespoons Parmesan cheese
2 teaspoons sea salt
1 teaspoon dried thyme
1 teaspoon dried rosemary
Tried it? Tag it!
I would love to see what you did with this recipe. Share your creation by tagging #inthekitchenwithjorj and with Scrumptious Possibilities With Jorj, my free private home cooking group.
DIRECTIONS FOR GARDEN ART FOCACCIA BREAD
Place the yeast and sugar into a small bowl. Stir in the warm water. Place the bowl in a warm place until the yeast is bubbling and fragrant, about 15 minutes. I use the proof setting on my warming drawer for this.
Use an electric mixer fitted with a dough hook to combine the flour, salt, ½ cup of olive oil and the yeast to form a dough. Once the dough comes together, continue to knead the dough in the machine until smooth. Stop the machine and check the dough every couple of minutes. The dough should be smooth and elastic, hold its shape around the dough hook and spring back when you indent it with your finger. This takes anywhere from 5 to 8 minutes using the mixer. If you are kneading by hand, knead until you can’t knead anymore!
Transfer the dough to a lightly floured surface. Knead it by hand for an additional 30 seconds. If the dough is too sticky, you can sprinkle with additional flour. Form the dough into a ball and transfer to a bowl that has been lightly coated with olive oil. Cover and place in a warm place to rise until doubled in size, about 1 hour. I use my warming drawer for this step, too.
Pour the remaining cup of olive oil onto a 12 ½ x 17 ½ x 1-inch jelly roll pan. Transfer the dough to the pan, stretching it out to fill the pan. Turn and coat with oil on both sides. Use your finger to poke indentations into the dough. These will be the “nooks and crannies” to hold the seasoning in the next step. Place the dough in a warm place to rise again, for 1 hour. Yep, the warming drawer is still the best place!
Preheat the oven to 400°. Transfer the pan from its warm place. Sprinkle with Parmesan cheese, sea salt, thyme, and rosemary. Drizzle with a bit more olive oil. Bake until the top of the bread is golden brown, about 15 to 20 minutes. Cool the bread in the pan before cutting into squares.


